Job Types
Skyhook supports two Kubernetes job types:Kubernetes Job
One-time executionSingle-container tasks that run once and exit. Best for standalone operations like migrations, data imports, and one-off scripts.
Kubernetes CronJob
Scheduled tasksRecurring single-container jobs on cron schedule with timezone support. Best for backups, cleanups, and regular maintenance.
Kubernetes Job
Key features:- Deploy & Run - Single button that deploys job manifest and triggers immediate execution
- Built-in retry mechanisms - Automatic pod restart on failure
- Automatic resource cleanup - TTL-based pod cleanup after completion
- Pod parallelism - Run multiple pods concurrently for the same job
- Completion tracking - Kubernetes tracks job completion status
Kubernetes CronJob
Key features:- Cron schedule syntax - Standard cron expressions (e.g.,
0 2 * * *for daily at 2 AM) - Timezone support - Schedule in local timezone, not just UTC
- Concurrency policies - Prevent overlapping runs (Allow, Forbid, Replace)
- Job history retention - Configure how many completed jobs to keep
- Manual trigger - Execute immediately outside schedule with “Run Now”
Creating a Job
1. Access the Job Creation Form
- Navigate to Jobs in the Skyhook UI
- Click Create New Job
- The job creation form appears with multiple configuration sections
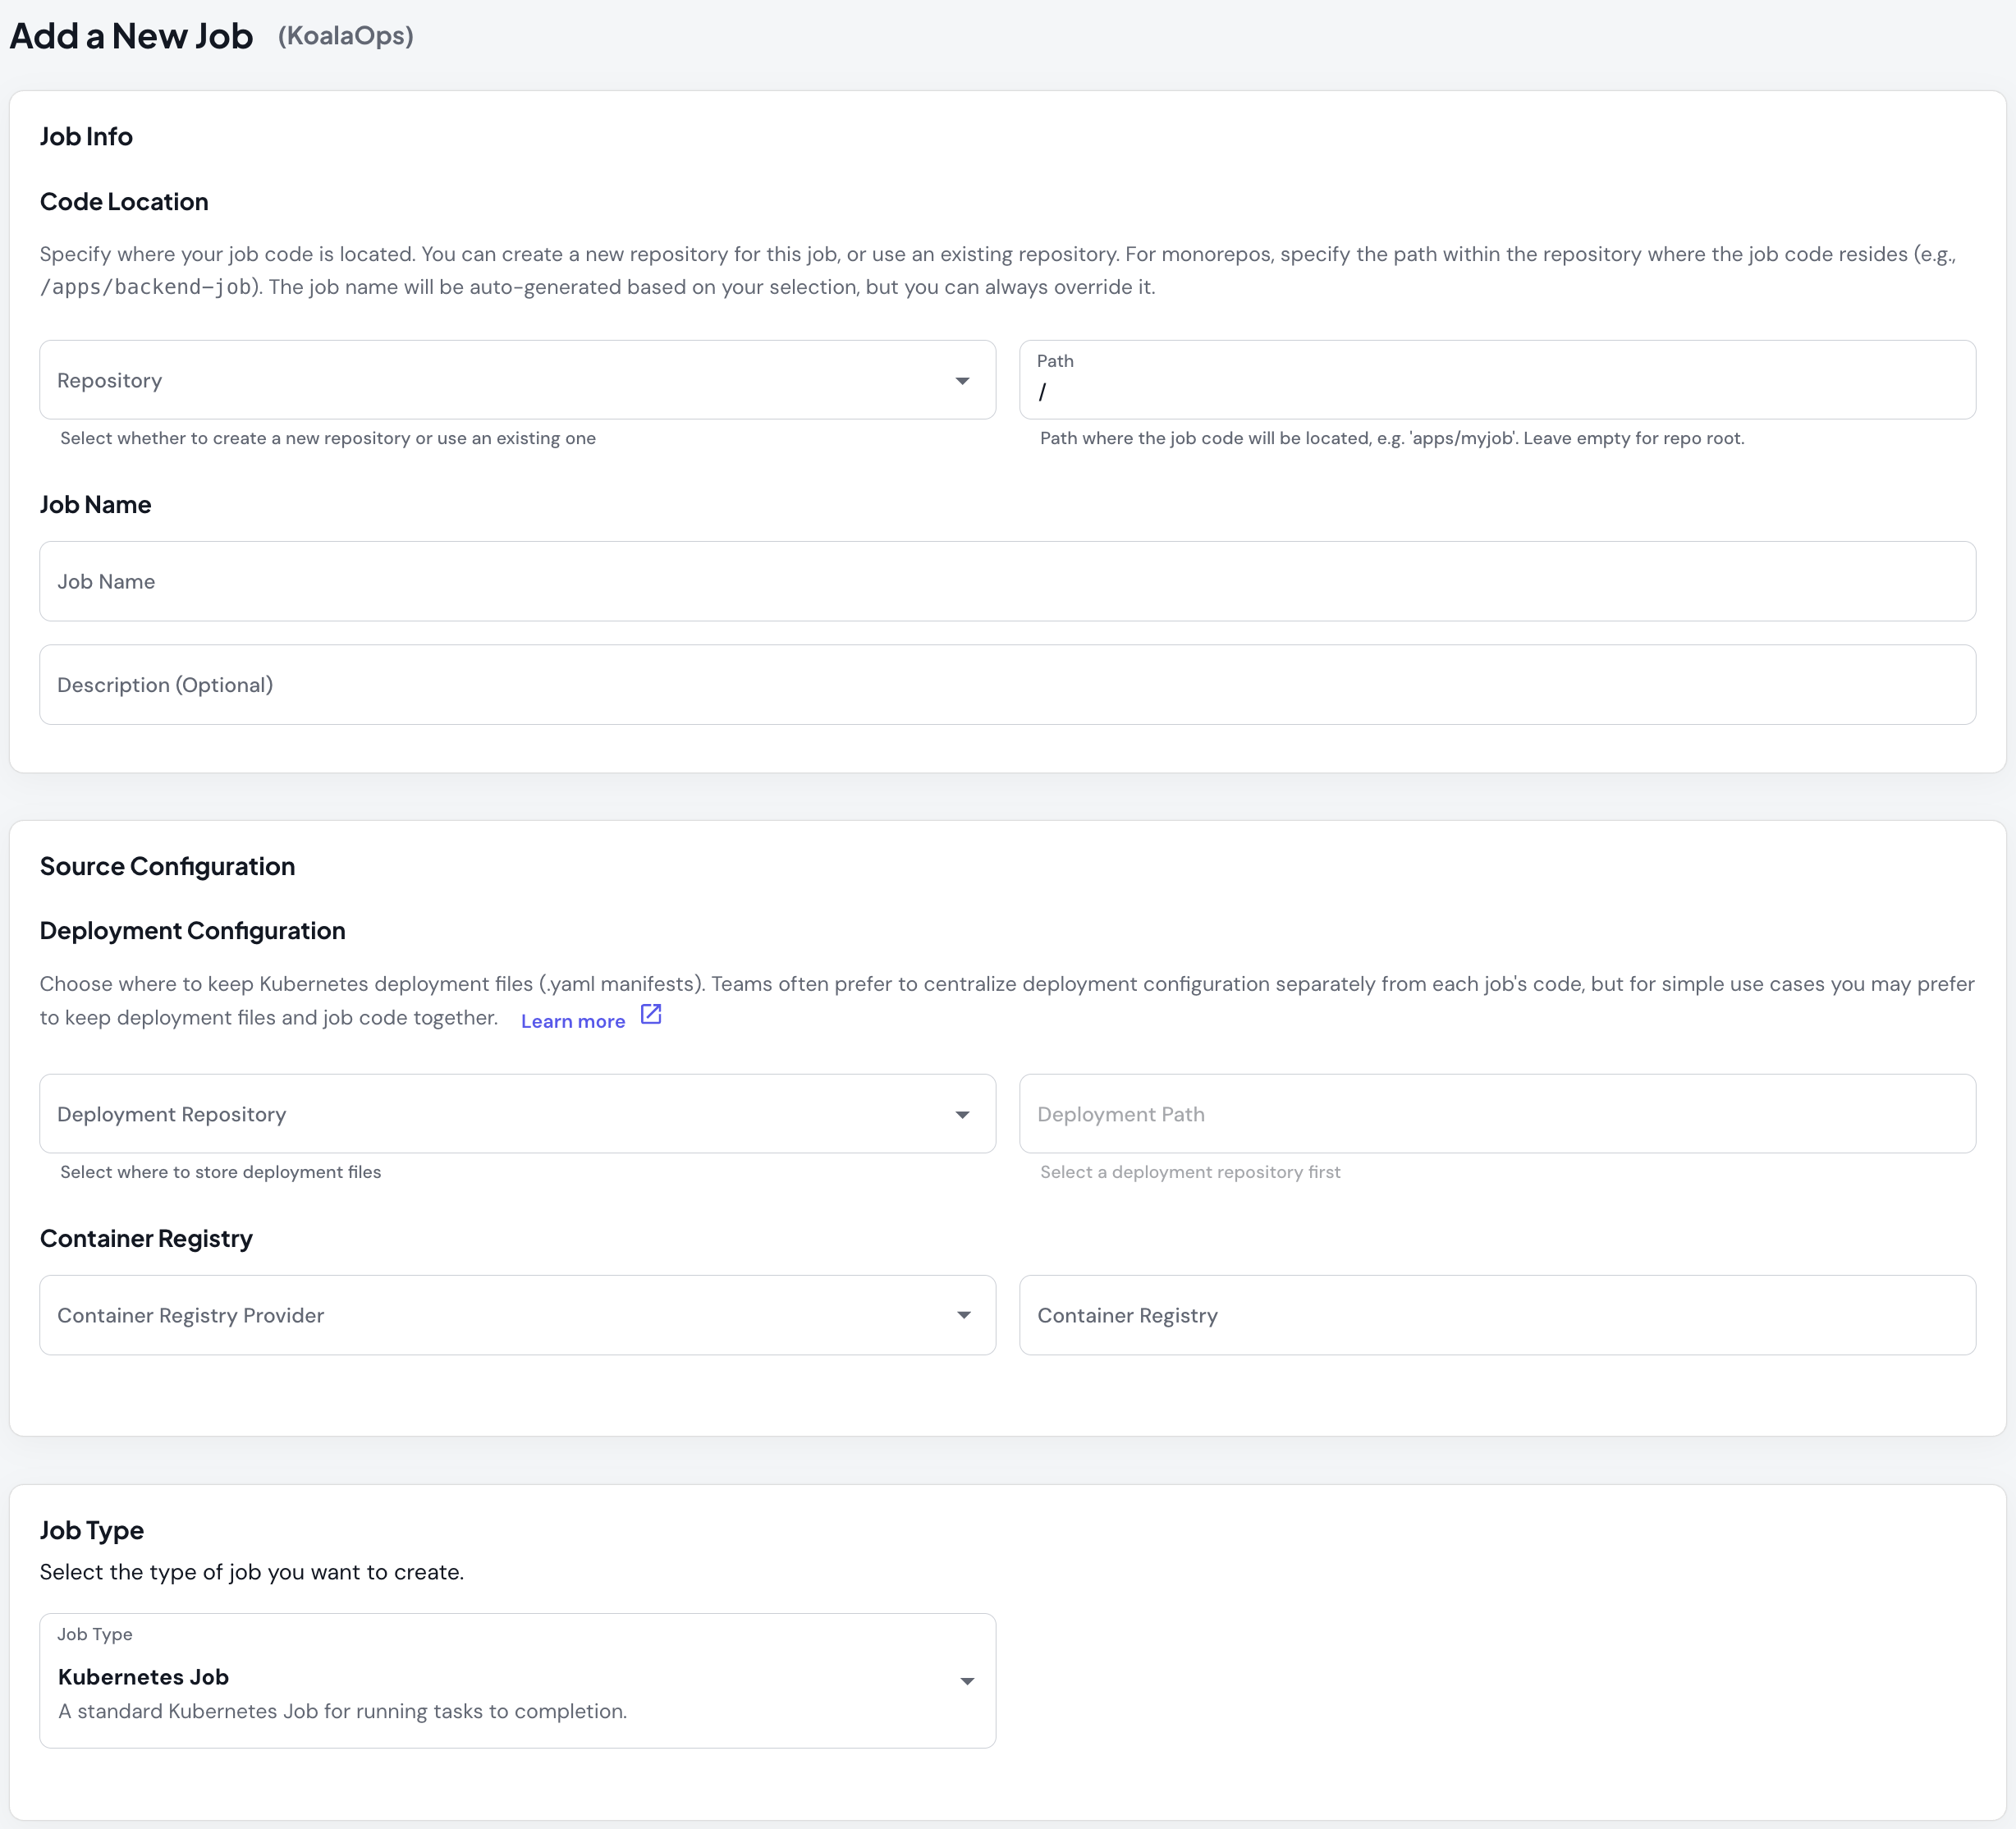
2. Basic Details
Configure your job’s fundamental properties: Job Name- Must be lowercase with no spaces
- Use hyphens for multi-word names (e.g.,
daily-data-sync) - Must be unique within your organization
- Brief explanation of the job’s purpose
- Helps team members understand the job’s function
- Select where your Docker images will be stored
- Supports ECR, GCR, GHCR, Docker Hub, and custom registries
- Format varies by provider:
- AWS ECR:
123456789.dkr.ecr.us-east-1.amazonaws.com - GCP Artifact Registry:
us-docker.pkg.dev/project-id/repository - GHCR:
ghcr.io/organization
- AWS ECR:
3. Repository Configuration
Choose how to set up your job’s code repository: Option A: Create New Repository- Skyhook creates a new Git repository for your job
- Initializes with basic job structure
- Best for brand new jobs
- Add job to an existing repository with multiple jobs or services
- Specify the path within the repository (e.g.,
/jobs/my-job) - Share code and infrastructure with other jobs/services
- Learn more about Multiple Services in One Repository
- Connect an existing repository containing job code
- Provide repository URL and path
- Skyhook configures CI/CD for the existing code
- Keep in job repository - Deployment files alongside code (simpler)
- Create separate deployment repository - Dedicated repo for configs
- Use existing deployment repository - Add to centralized deployment repo
4. Select Job Type
Choose between Kubernetes Job (one-time), Kubernetes CronJob (scheduled), Argo Workflow, or Argo CronWorkflow. The dropdown displays each job type with a description to help you choose the right option for your use case.5. Cron Configuration (CronJob only)
When you select CronJob, additional scheduling options appear: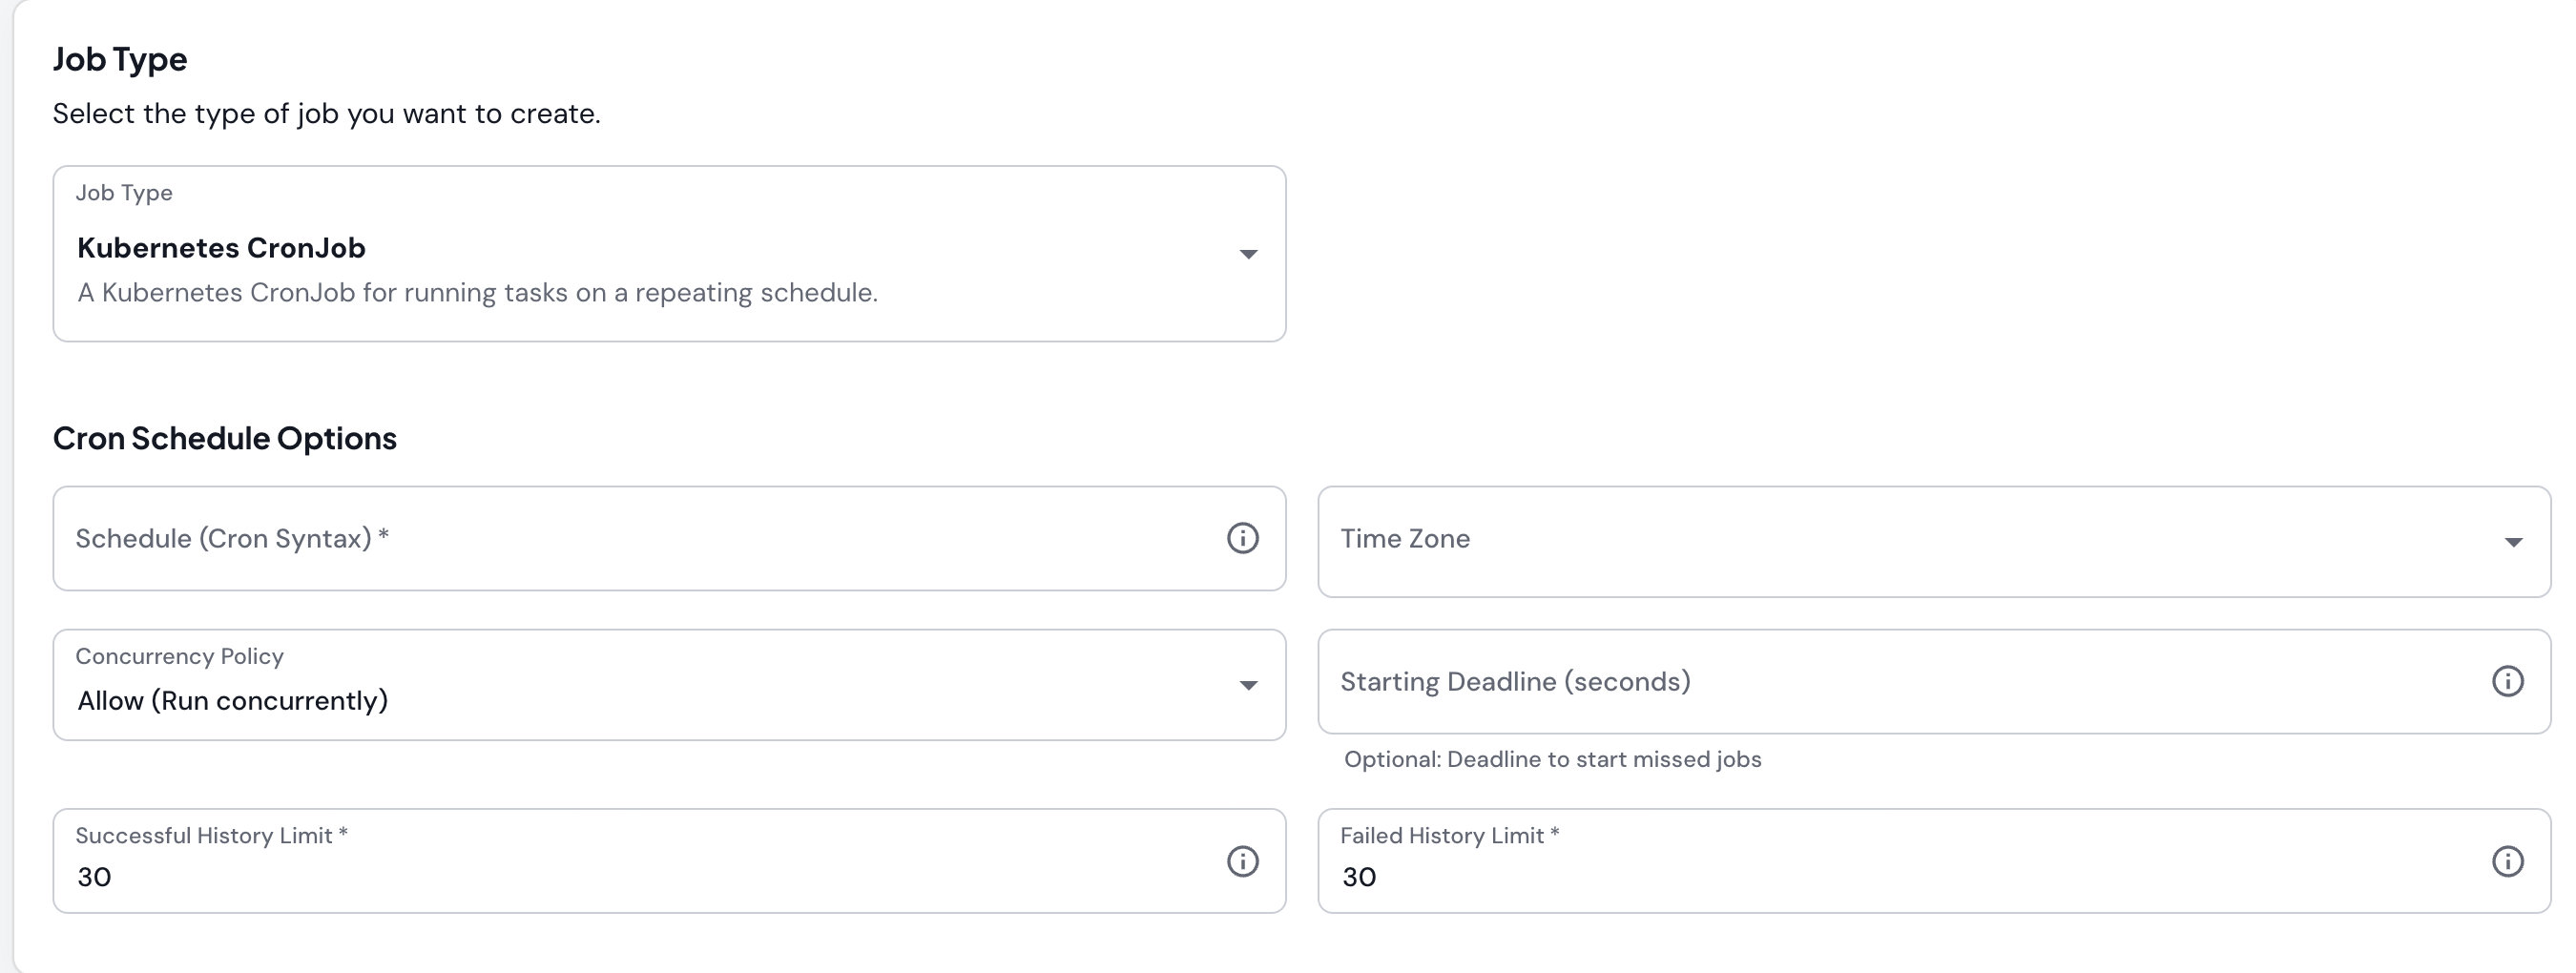
- Standard 5-field cron expression:
minute hour day month weekday - Examples:
0 2 * * *- Every day at 2:00 AM0 */6 * * *- Every 6 hours0 0 * * 0- Every Sunday at midnight30 14 1 * *- At 2:30 PM on the first day of each month
- Shortcuts:
@hourly- Run every hour@dailyor@midnight- Run daily at midnight@weekly- Run weekly on Sunday at midnight@monthly- Run monthly on the first at midnight
- Select from searchable dropdown of all IANA timezones
- UI displays current UTC offset for each timezone (e.g.,
America/New_York (GMT-5)) - Ensures schedule runs at the correct local time regardless of DST changes
- Allow - Allow concurrent executions (jobs can overlap)
- Forbid - Skip new run if previous is still running
- Replace - Cancel previous run and start new one
- Maximum seconds to start a missed job
- If job misses its schedule and this deadline passes, skip it
- Useful for preventing backlog of missed jobs
- Number of successful job pods to retain
- Older successful jobs are automatically cleaned up
- Recommended: 3-30 depending on debugging needs
- Number of failed job pods to retain
- Keep failed jobs longer for debugging
- Recommended: 1-30 depending on failure frequency
6. Add Environments
Configure where your job will run:- Click Add Environment
- For each environment, provide:
- Name - Environment identifier (dev, staging, prod, etc.)
- Namespace - Kubernetes namespace (must exist in cluster)
- Cluster - Select from available clusters in your organization
- Add multiple environments as needed
7. Submit and Create
- Review all configuration
- Click Create Job
- Skyhook creates the job and redirects to the job detail page
Executing Jobs
- Kubernetes Job
- Kubernetes CronJob
Deploy & Run in one action
Kubernetes Jobs combine deployment and execution in a single action.To execute:- Navigate to your job’s detail page
- Click Deploy & Run
- Configure deployment options:
- Build new image or deploy existing image
- Select Git code reference (branch, tag, commit)
- Choose config reference for Kubernetes manifests
- Pick target environment
- Review deployment summary
- Click Deploy
- GitHub Actions workflow builds image (if needed)
- Deploys job manifest to cluster
- Job immediately creates pod(s) and starts execution
- Job runs to completion
- Pod cleanup after TTL expiration
- View workflow progress via GitHub Actions link
- Monitor job status on Executions tab
- Check pod logs once running
Monitoring Executions
Executions Tab
The Executions tab provides a comprehensive view of all job runs. Access:- Navigate to job detail page
- Click Executions tab
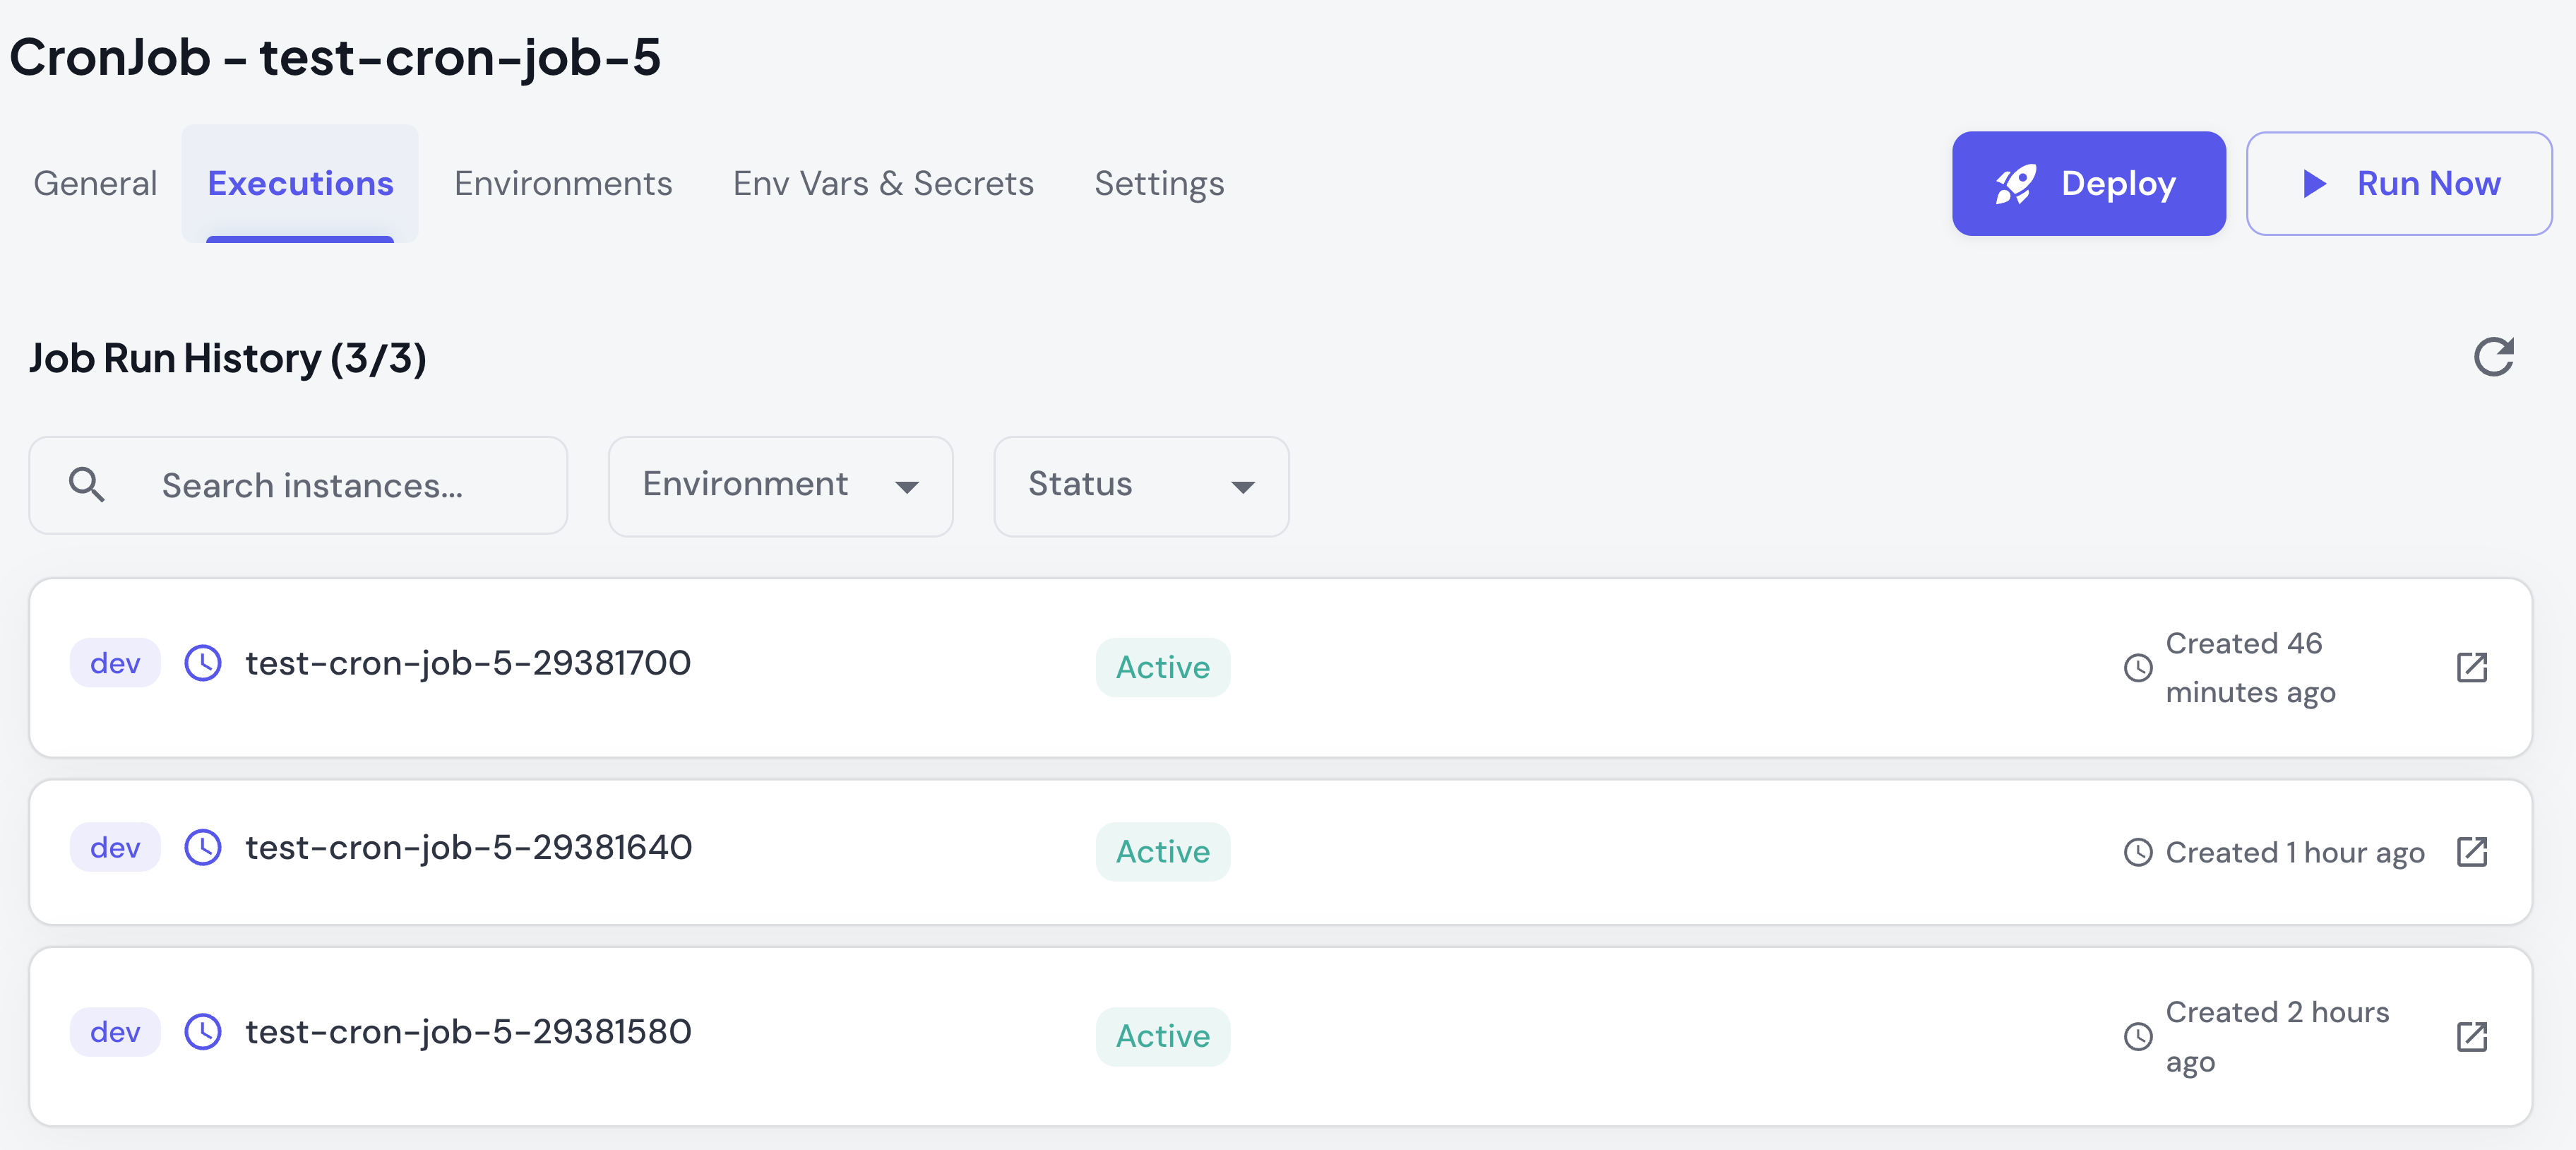
- List of all job instances/executions
- Status for each execution (Running, Succeeded, Failed, Pending)
- Start time, completion time, duration
- Environment where job ran
- Filter and search capabilities
- By environment (dev, staging, prod)
- By status (succeeded, failed, running)
- By job name (search/filter)
- Date range (recent executions)
Execution Status
Jobs display different statuses throughout their lifecycle:Job Details
Execution details show: Pod Information:- Active Pods - Currently running
- Succeeded Pods - Completed successfully
- Failed Pods - Terminated with errors
- Completions required
- Parallelism (concurrent pods)
- Restart policy
- Active deadline
- Start time
- Completion time (when finished)
- Duration (total execution time)
- View pod logs
- Inspect pod details
- Download logs
Viewing Logs
Access Pod Logs:- Click on a job execution in the list
- Expand pod details
- Click View Logs
- Logs display in real-time
Managing Your Job
The job detail page provides everything you need to manage your job through the Skyhook UI: General Tab- View basic details and cron schedule (for CronJobs)
- See next run time and recent execution history
- Quick status overview with badges
- Add, edit, or remove environments
- Update cluster and namespace assignments
- Environment-specific configuration
- Set global variables (shared across all environments)
- Configure environment-specific variables
- Manage encrypted secrets (integrated with Sealed Secrets)
- Update execution settings (active deadline, retry strategy)
- Configure resource limits (CPU, memory)
- Adjust history retention limits (for CronJobs)
Advanced: Manual Configuration
Advanced: Manual Configuration
For advanced users, Skyhook uses Kustomize to manage job configurations. Jobs are stored in Git with environment-specific overrides:Base configuration defines the core job specification (container image, command, resources).Environment overlays provide environment-specific customizations (different resources, schedules, env vars per environment).You can edit these files directly in your Git repository for advanced configuration not available in the UI.
Common Tasks
Change CronJob Schedule
- Go to Settings tab
- Update cron schedule expression
- Optionally update timezone
- Click Save
- Deploy changes to environments
Add Environment Variables
- Navigate to Env Vars & Secrets tab
- Click Add
- Choose variable type (global, environment-specific, or secret)
- Enter key and value
- Click Save
- Redeploy job to apply
Update Resource Limits
- Go to Settings → Execution section
- Update CPU or memory limits
- Click Save
- Redeploy to environment
Pause a CronJob
UI support for pausing CronJobs is coming soon.
suspend to false.