The same wizard is used for Jobs — just click New Job instead. The flow adds one extra step (Job Type) where you pick between Kubernetes Job, CronJob, Argo Workflow, or Argo CronWorkflow. Everything else on this page applies to jobs too.
Opening the wizard
Three entry points in the UI:- New Service / New Job buttons in the top-right of the Home dashboard
- New Service button on the Services list page
- Deploy… button on the Clusters list (if no services exist yet)
Or from the CLI
For importing an existing repo, the terminal path is usually faster:skyhook init runs the same detection pipeline as the wizard (language, framework, container port, Dockerfile location, monorepo layout, env vars) and presents the results in a single form. skyhook detect runs detection only, so you can preview or script against the results (skyhook detect --json | jq .).
The rest of this page walks through the UI wizard. Both paths produce the same service and open the same set of pull requests.
Step 1 — Service Info
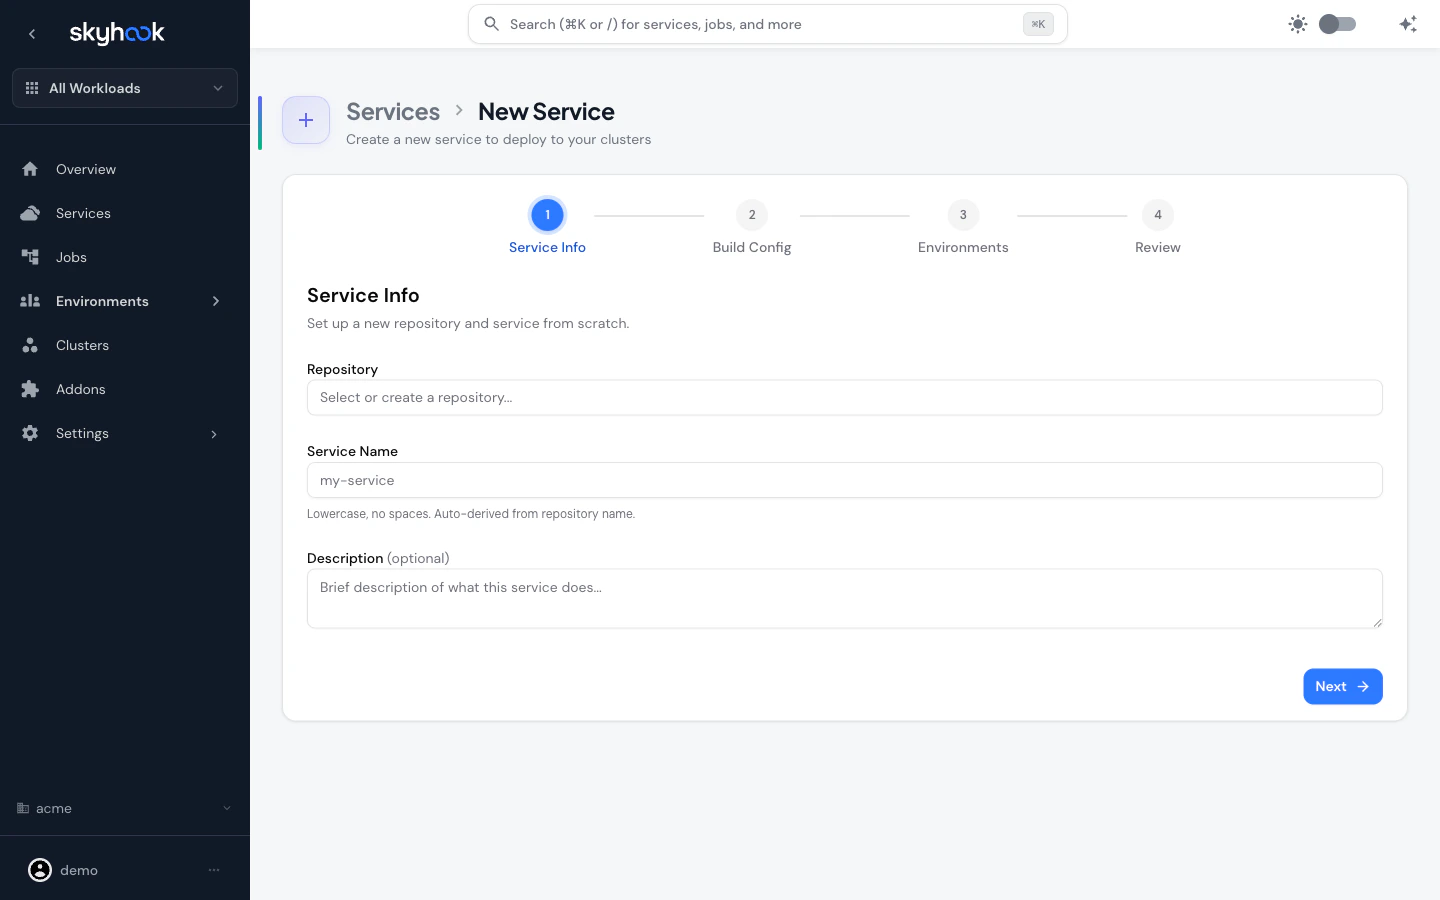
Create a new repository
Type a name that doesn’t match any existing repo — Skyhook creates a new repository from a template and registers the service in one shot. You’ll get to pick from managed templates like Go Server, Java Quarkus, Python Flask, Python FastAPI, Node.js Express, Node.js NestJS, Node.js Next.js, and a few others pulled fromKoalaOps/koala-templates.
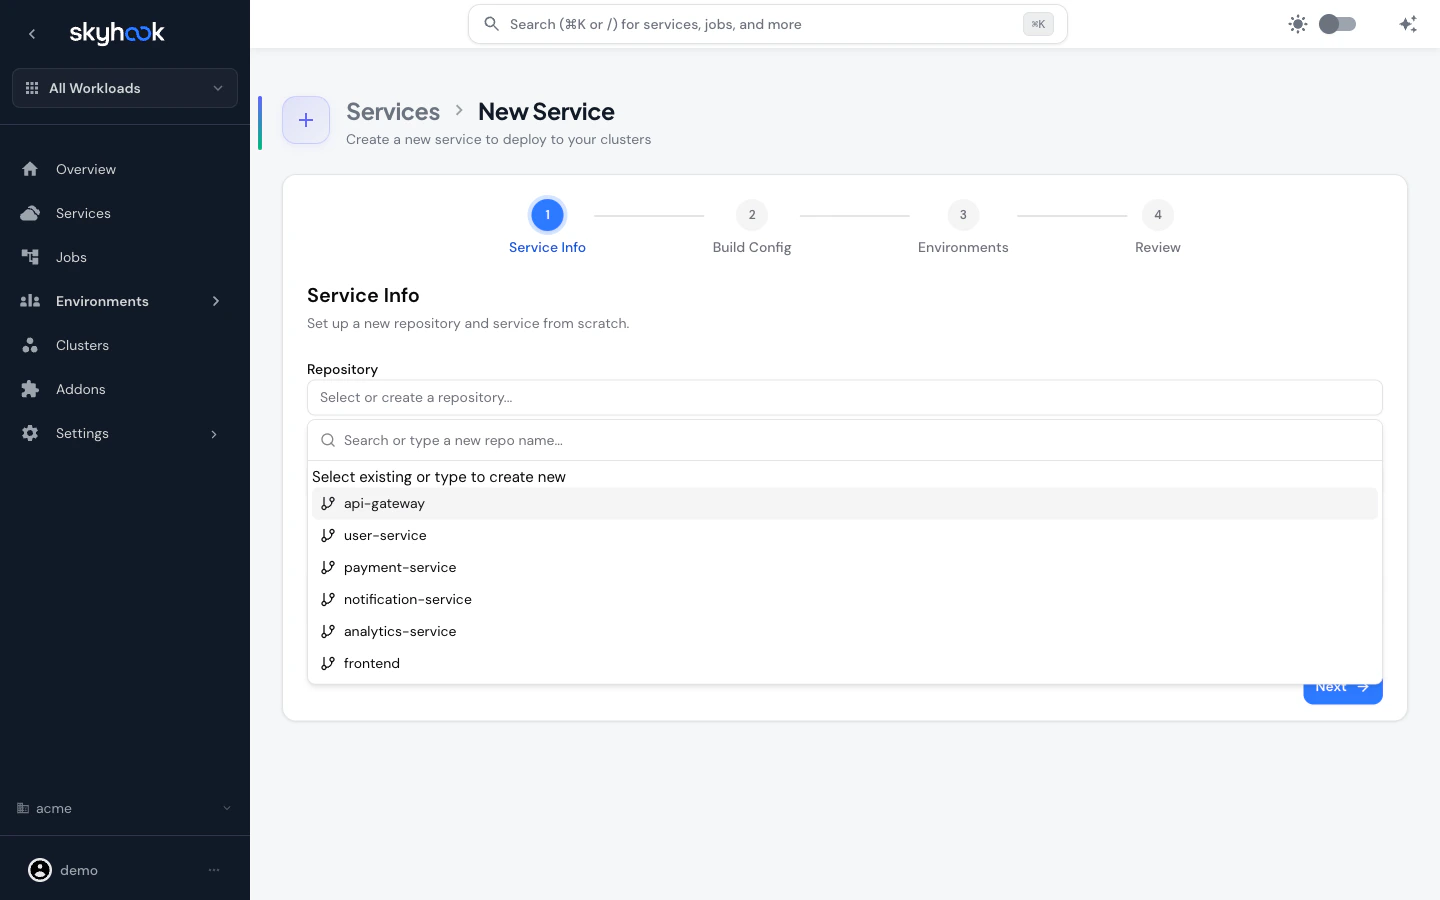
Import an existing repository
Pick an existing repo from the list. Skyhook immediately triggers repo detection in the background:- Description is auto-filled from the GitHub repo description
- Service name is auto-derived from the repo name (lowercase, no spaces)
- Path in Repository lets you point at a subfolder if the code isn’t at the repo root
- Monorepo detection — if the repo is a monorepo with multiple services, an inline picker lists each service as a clickable chip (with name, path, language, and a Dockerfile indicator). Selecting a service auto-sets the path and service name; a Custom path… option lets you enter a path manually
Step 2 — Build Config
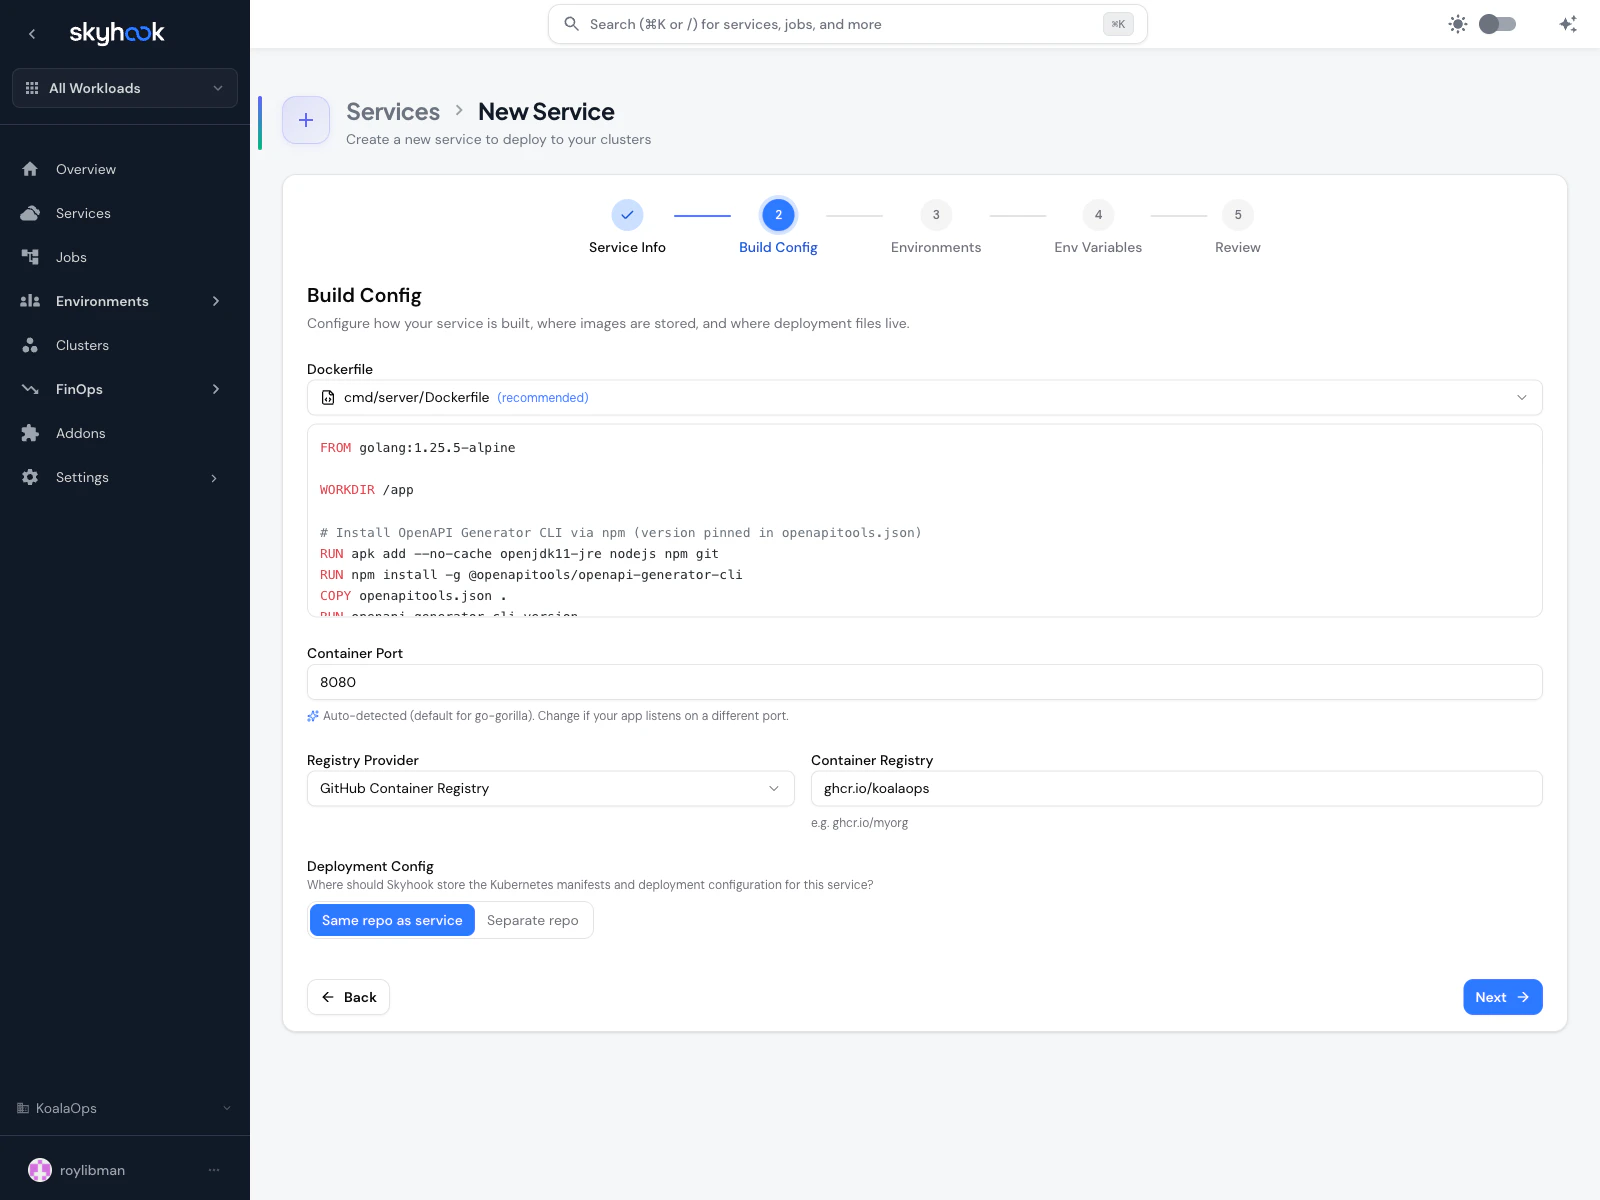
Dockerfile
- Dockerfile found — Skyhook uses the one it detected. You can override the path.
- No Dockerfile — Skyhook offers to generate one based on the detected framework.
Container Port
The port your application listens on. Auto-filled from DockerfileEXPOSE when present.
Container Registry
- Registry Provider — dropdown for GitHub Container Registry, Docker Hub, AWS ECR, GCP Artifact Registry, etc.
- Container Registry — the specific registry URL (e.g.
ghcr.io/acme). Defaults to the org setting.
Deployment Config
Where Skyhook should write the generated Kubernetes manifests:- Same repo as service — manifests go into a folder inside the service repo (monorepo-style)
- Separate repo — manifests go into a dedicated GitOps/deployment repo (recommended for multiple services). Picks the org default repo automatically.
Step 3 — Environments
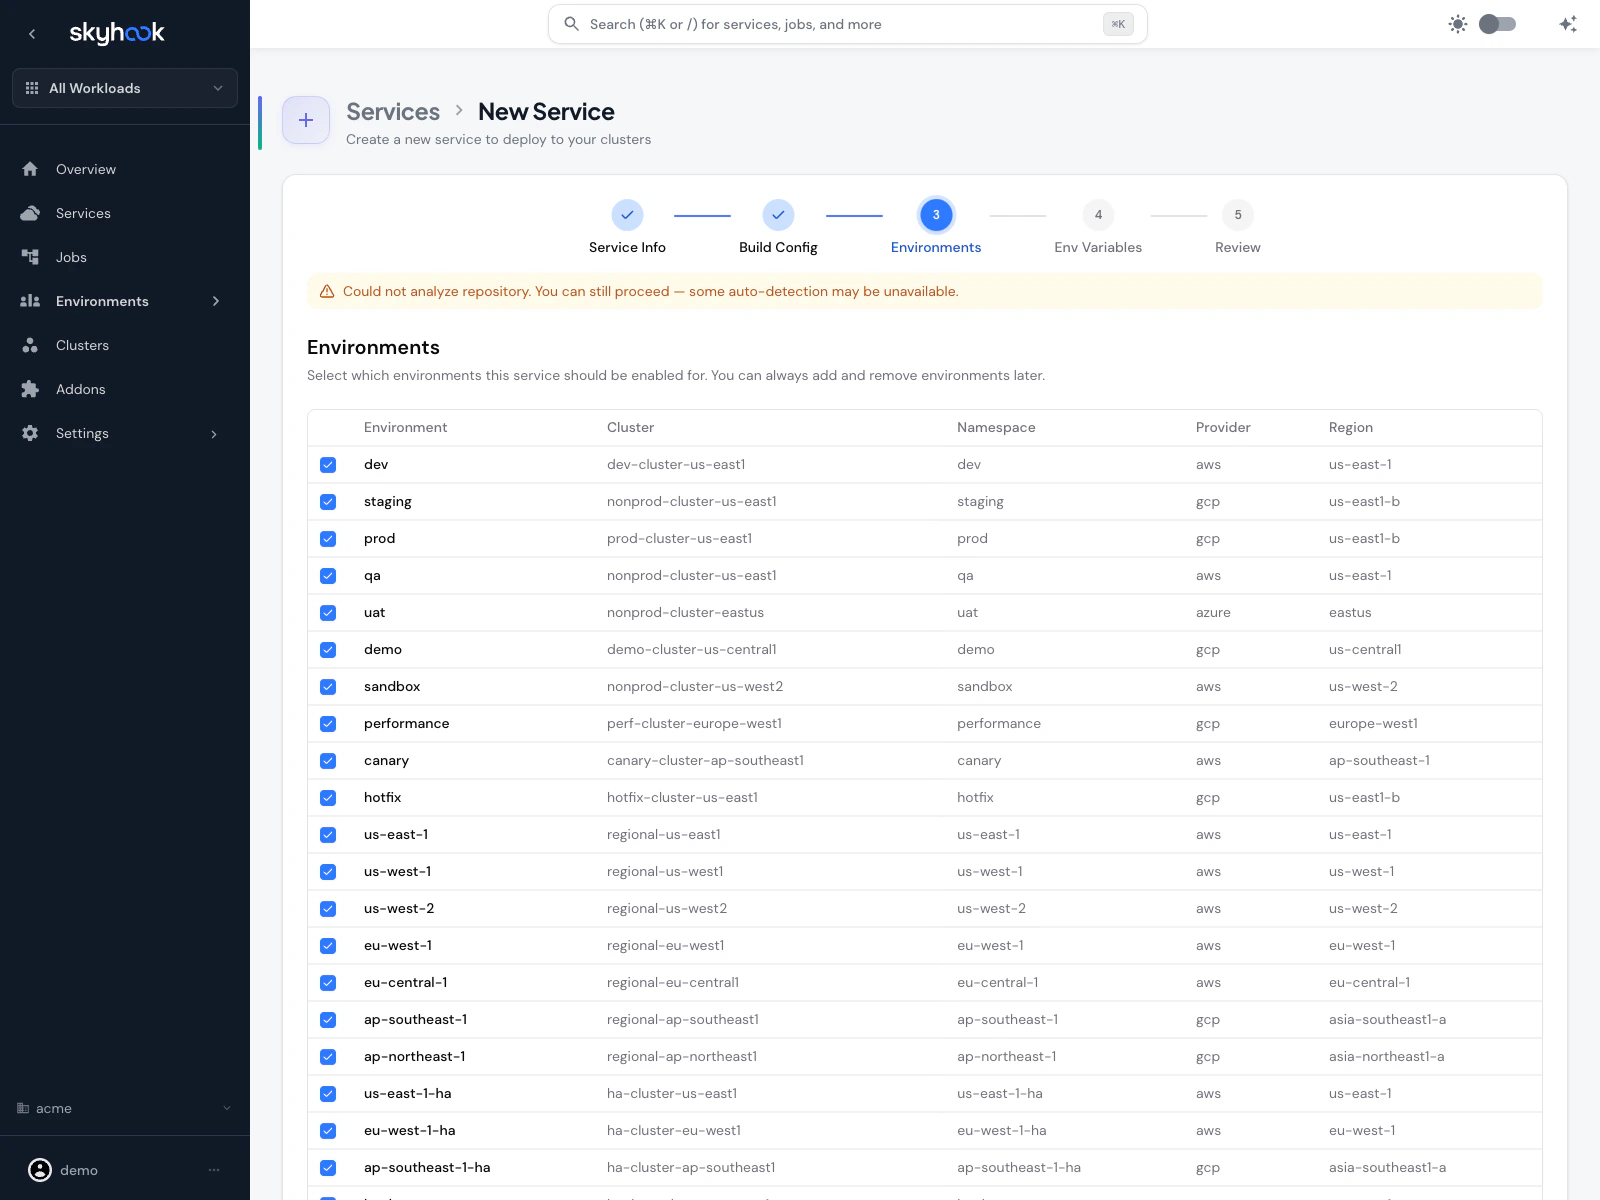
- Check one or more rows
- For new services without an org-level environment yet, Skyhook starts you with a default
devandprodpair you can accept and adjust later - Smart cluster defaults pull from other services in the org, so the first environment picks the most-used cluster automatically
- When importing an existing service, environments are populated from the service’s actual configuration once it loads
Step 4 — Environment Variables (import only)
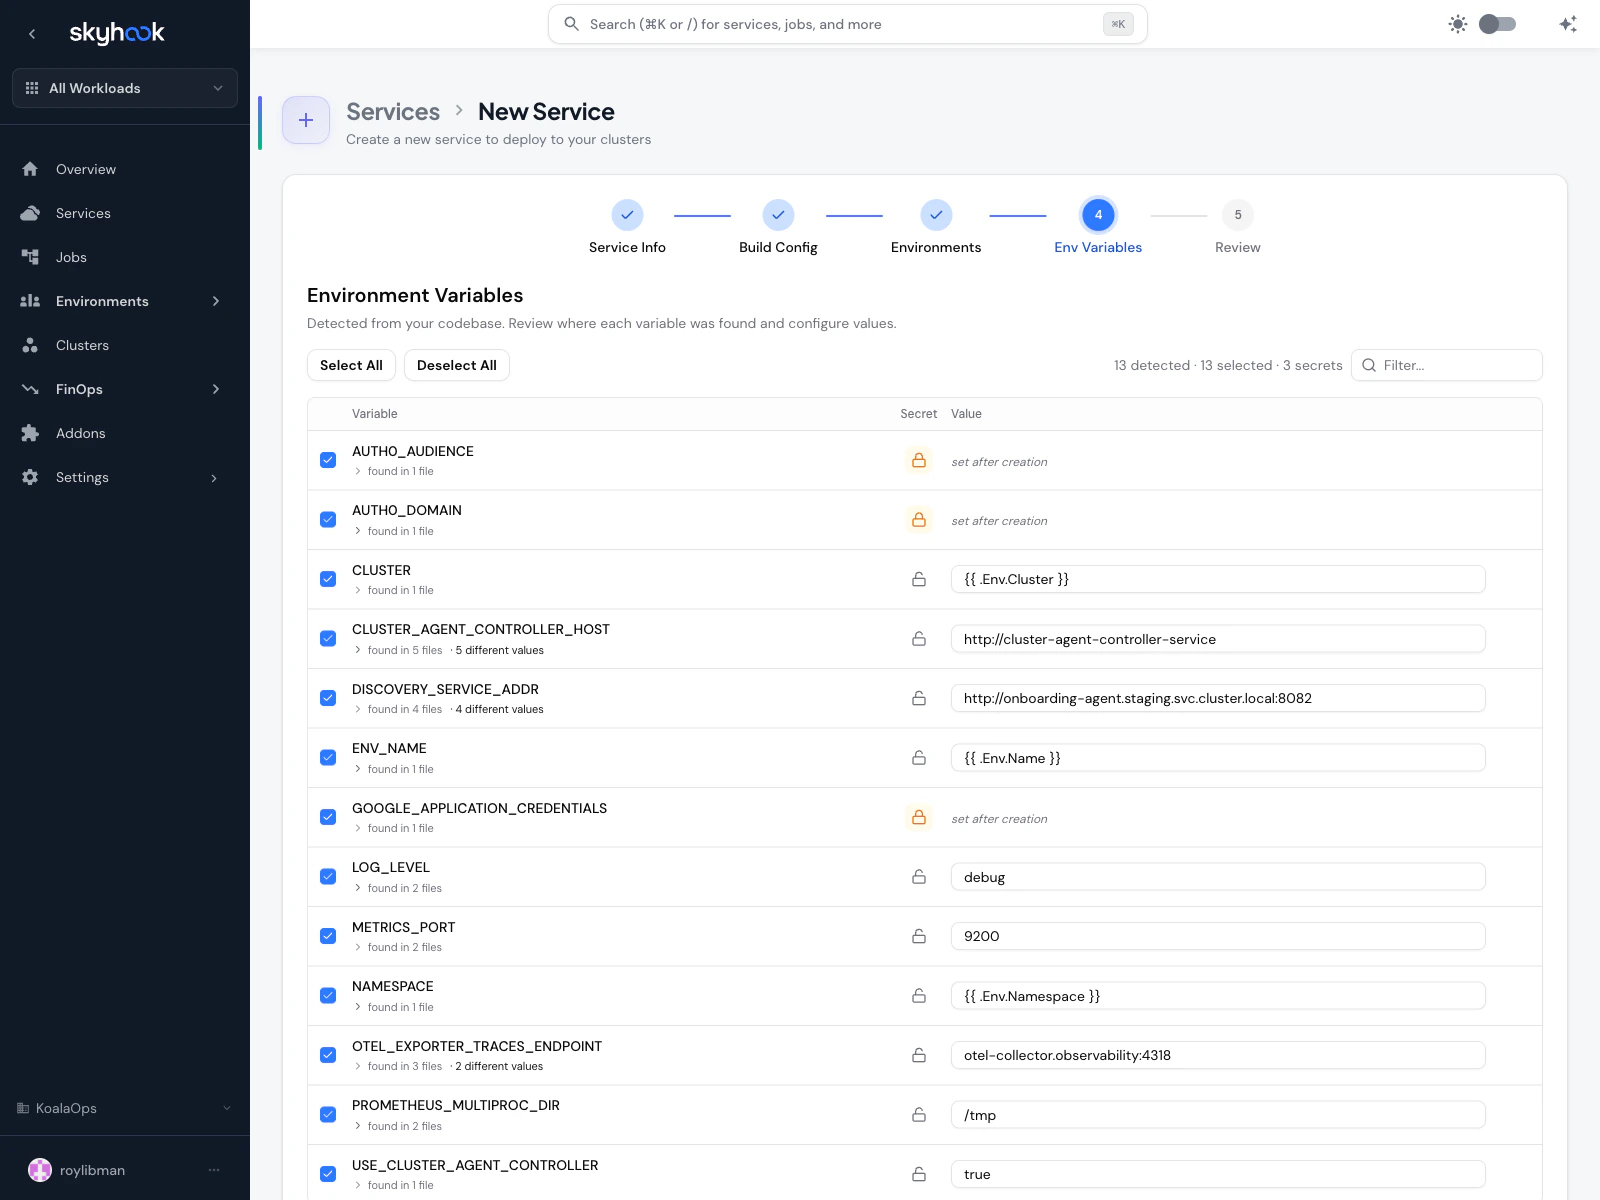
process.env.X, os.Getenv("X"), System.getenv("X"), Helm chart values, and Kubernetes manifests, then shows every variable it found with:
- Variable name
- Source location — “found in N files” (click to expand). When the same variable has different values in different files, Skyhook tells you “N different values” so you can pick the right one.
- Secret toggle — promote a variable to a Kubernetes secret (secret values aren’t checked into Git; you’re prompted to set after creation)
- Value — auto-filled from what Skyhook found in code, or editable per-environment
Header controls
- Select All / Deselect All — bulk toggle inclusion
N detected · N selected · N secrets— running counts so you can see what’s in
Defaults
- Well-known secret-shaped names (
*_TOKEN,*_KEY,*_PASSWORD, credentials paths) are auto-flagged as secrets - Variables found in only one file are auto-selected with the found value
- Variables found in multiple files with different values are auto-selected but left unset so you can pick a value intentionally
AI-powered discovery
For codebases where pattern-matching misses references (indirect environment access, dynamic lookups), click Discover to run an AI-powered analyzer that identifies likely environment variables and secrets. Results are filterable by type (Variables, Secrets, or All), confidence level, and source file. The same Discover action is also available on the Env Vars & Secrets tab of existing services.Add manually
If detection missed something, use Add variable manually at the bottom to enter a name, value, and secret flag. All selections from this step become the service’s base env vars + per-environment overrides. You can refine them later on the service’s Env Vars & Secrets tab.Step 5 — Review & Import
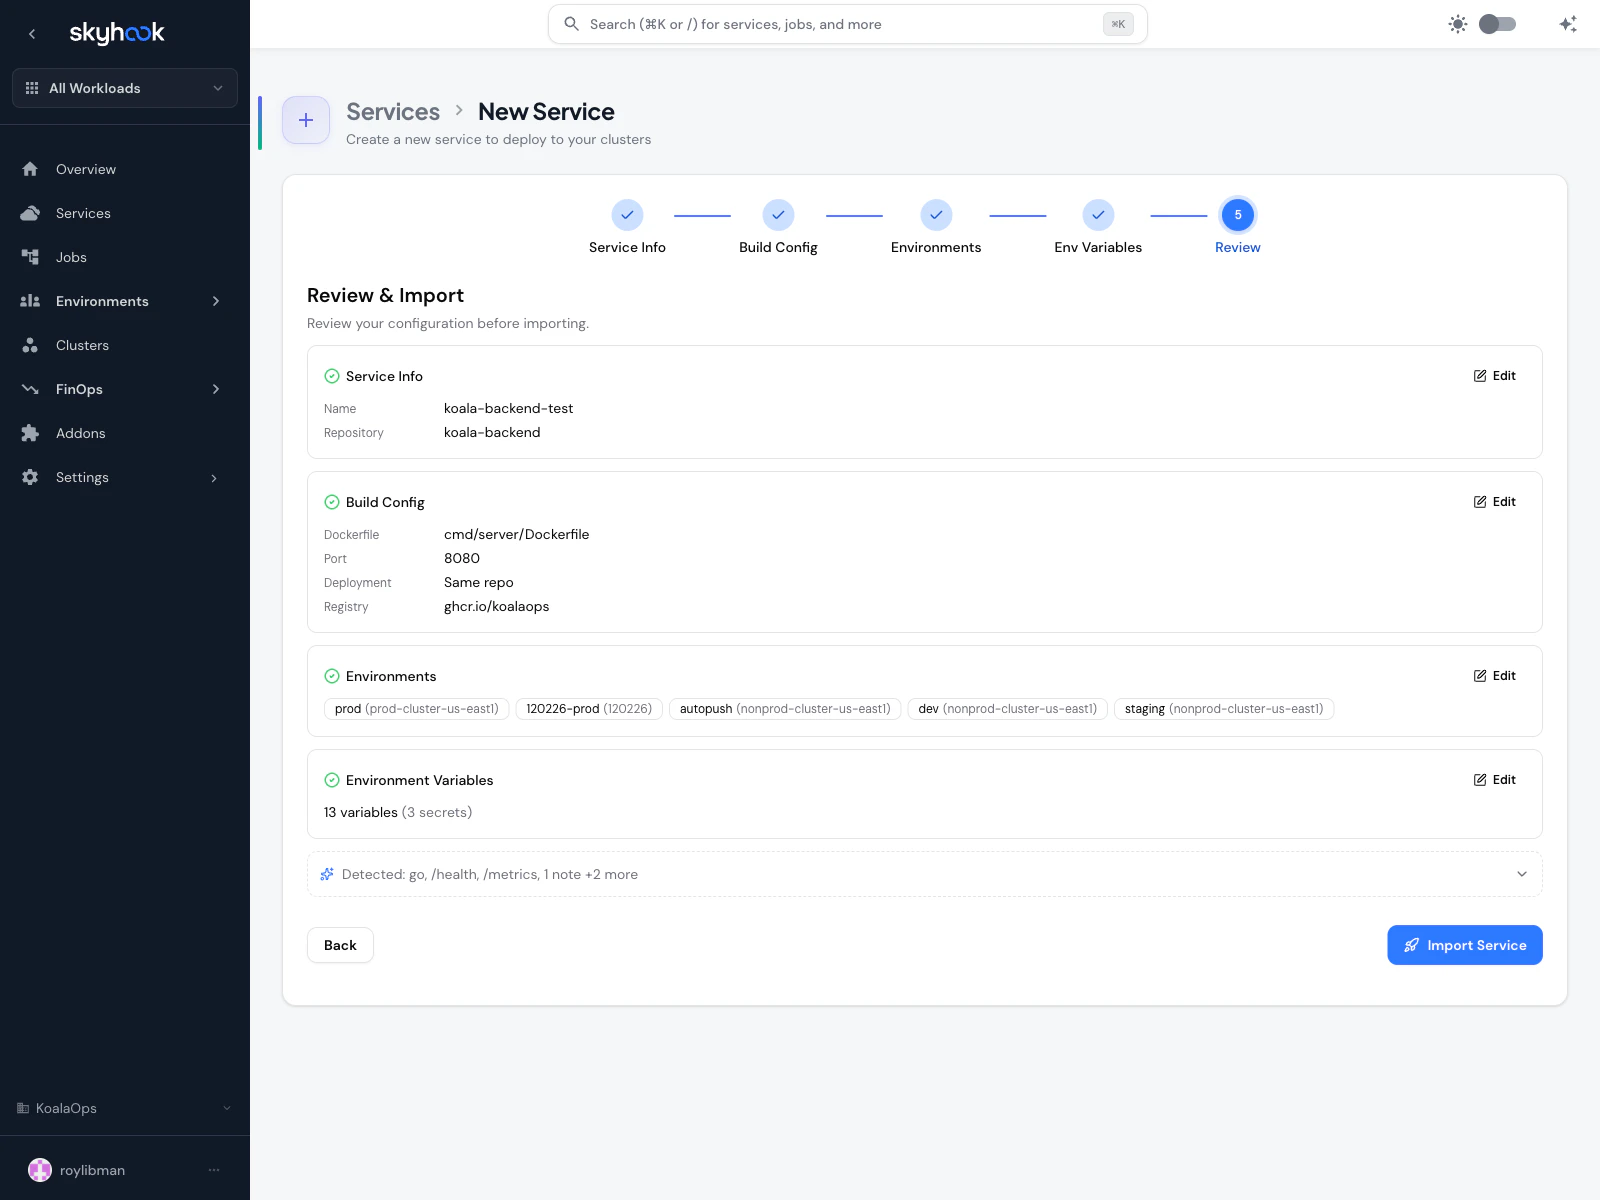
go, health, routes).
Adaptations
For imported services, a dedicated Adaptations section shows any warnings or info messages from the detection pipeline along with the auto-fix Skyhook will apply:- “Dockerfile
EXPOSE 8080mismatches detected app port 3000 — will use 3000” - “Missing Helm chart — one will be generated from the service name”
- “No Kubernetes manifests found — base manifests will be generated”
Submit
Clicking Import Service (or Create Service) kicks off the setup process in three phases:- Setup — Skyhook creates the required files and opens the pull requests needed to register the service
- Review and merge — a status panel shows every pull request Skyhook opened, waiting for you to review and merge them. Each one has a Review PR button that opens the in-app pull request review
- Done — once every pull request is merged and the repository files are in place, Skyhook takes you to the new service page
A single service creation can open up to 3 PRs — one against the service repo (Dockerfile, workflows, koala-config), one against the deployment/GitOps repo (Kubernetes manifests), and one against the GitOps registration repo (service discovery). The PR gate keeps all of them visible in one place so you’re never guessing which one is left.
After creation
Once the service page loads, a Pending PRs banner at the top shows any migration or setup PRs that are still in flight. Each row has a Review PR button; rows disappear automatically as PRs are merged. From there, use the service tabs (General, Runtime, API, Logs, Deployments, Production Readiness, Env Vars & Secrets, Settings) to configure and operate the service.Troubleshooting
Monorepo picker doesn't show my service
Monorepo picker doesn't show my service
Monorepo detection looks for common layouts (
services/, apps/, packages/, cmd/) with a Dockerfile or package manifest. If your service lives outside those paths, click Custom path… and enter the subdirectory manually.Port conflict alert — which port should I pick?
Port conflict alert — which port should I pick?
In Kubernetes,
EXPOSE in a Dockerfile is purely informational — the actual port is what your app listens on. If your Node server calls app.listen(3000) but the Dockerfile has EXPOSE 8080, pick 3000. The recommended button on the alert corresponds to the port your app actually binds to.Deployment repository field is empty after step 1
Deployment repository field is empty after step 1
Re-select the repository in step 1 and the smart defaults will re-apply.
Review-and-merge step keeps showing 'not merged'
Review-and-merge step keeps showing 'not merged'
Skyhook checks GitHub for merge status every few seconds. If a pull request shows as merged on GitHub but the setup panel doesn’t update, click Refresh. Skyhook also verifies that the expected files are actually in place, so a partial merge (only some of the pull requests) will still show as pending.