Environments list
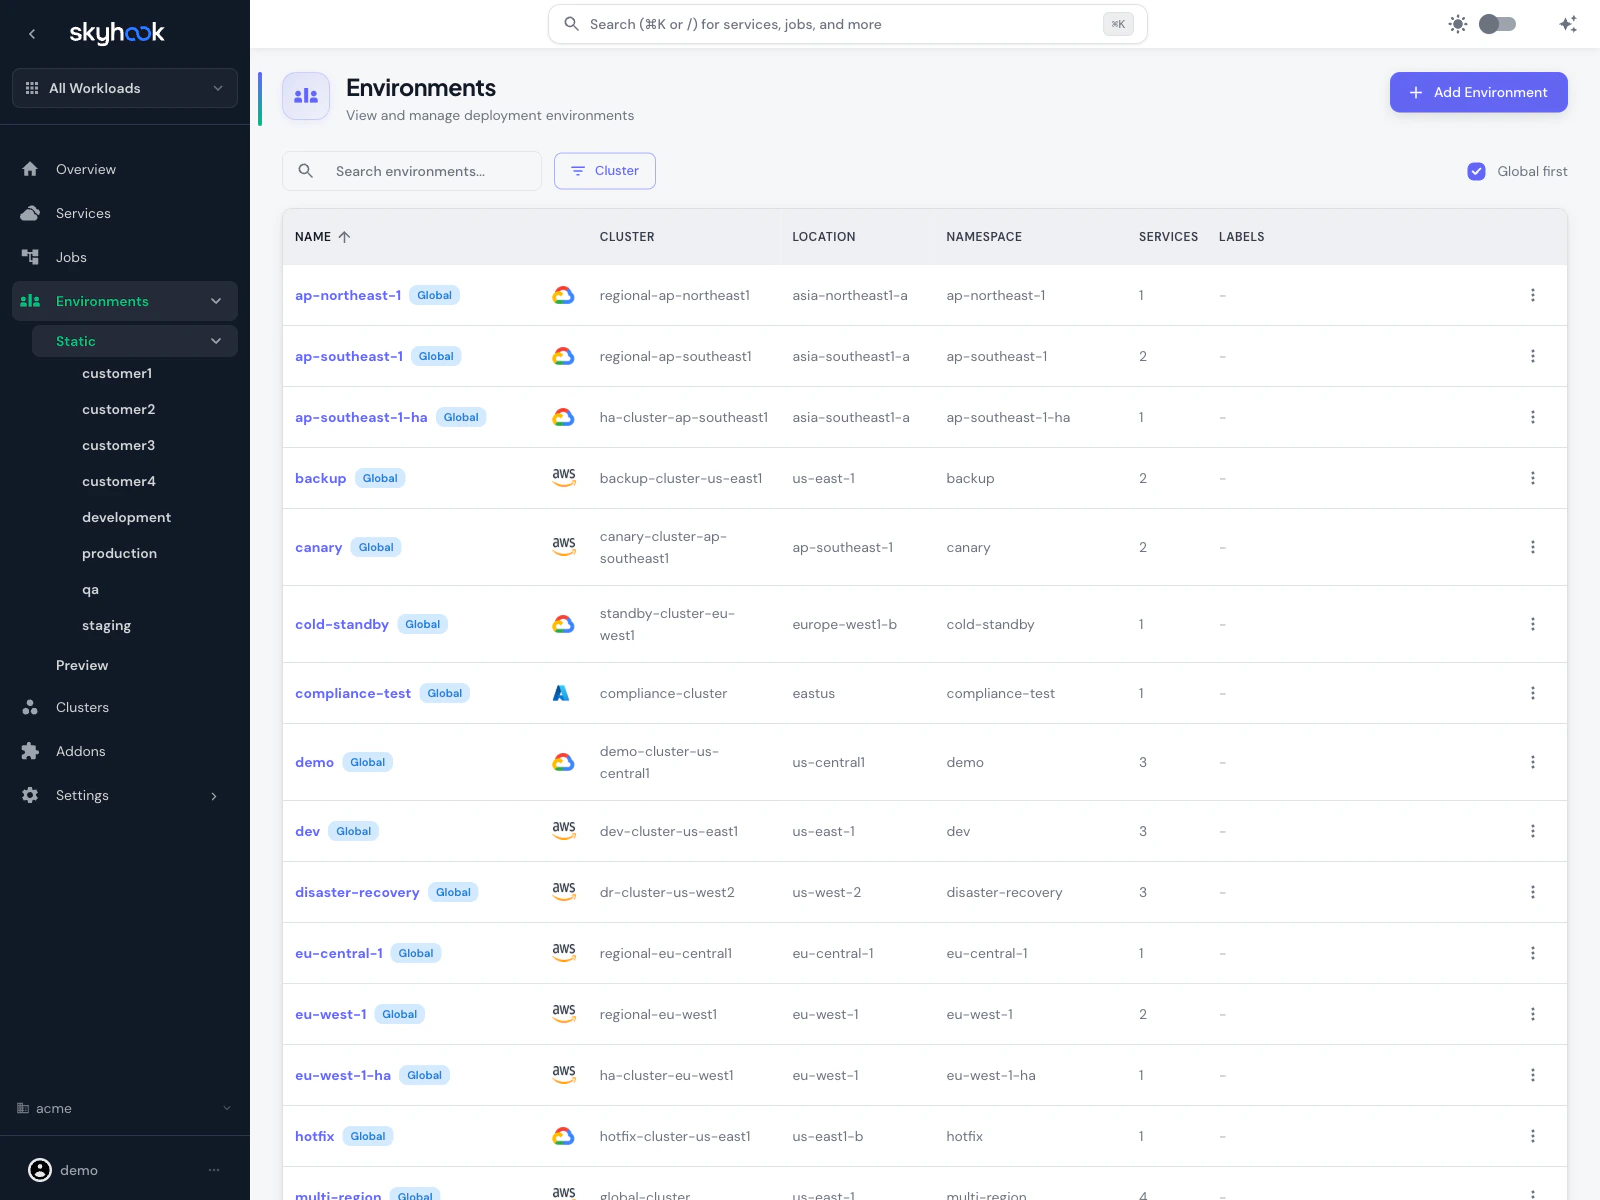
- Name — the environment identifier (e.g.
dev,prod,staging,ap-northeast-1) - Cluster — target cluster with provider icon (AWS, GCP, Azure)
- Location — the cluster’s region/zone
- Namespace — Kubernetes namespace
- Services — count of services currently deployed
- Labels — tags applied to this environment
Searching and filtering
- Search box matches on name, cluster, namespace
- Cluster dropdown filters to environments on a specific cluster
- Column headers are sortable
- Rows per page is configurable (default 50)
Creating an environment
Click Add Environment in the top-right. Skyhook opens a create dialog.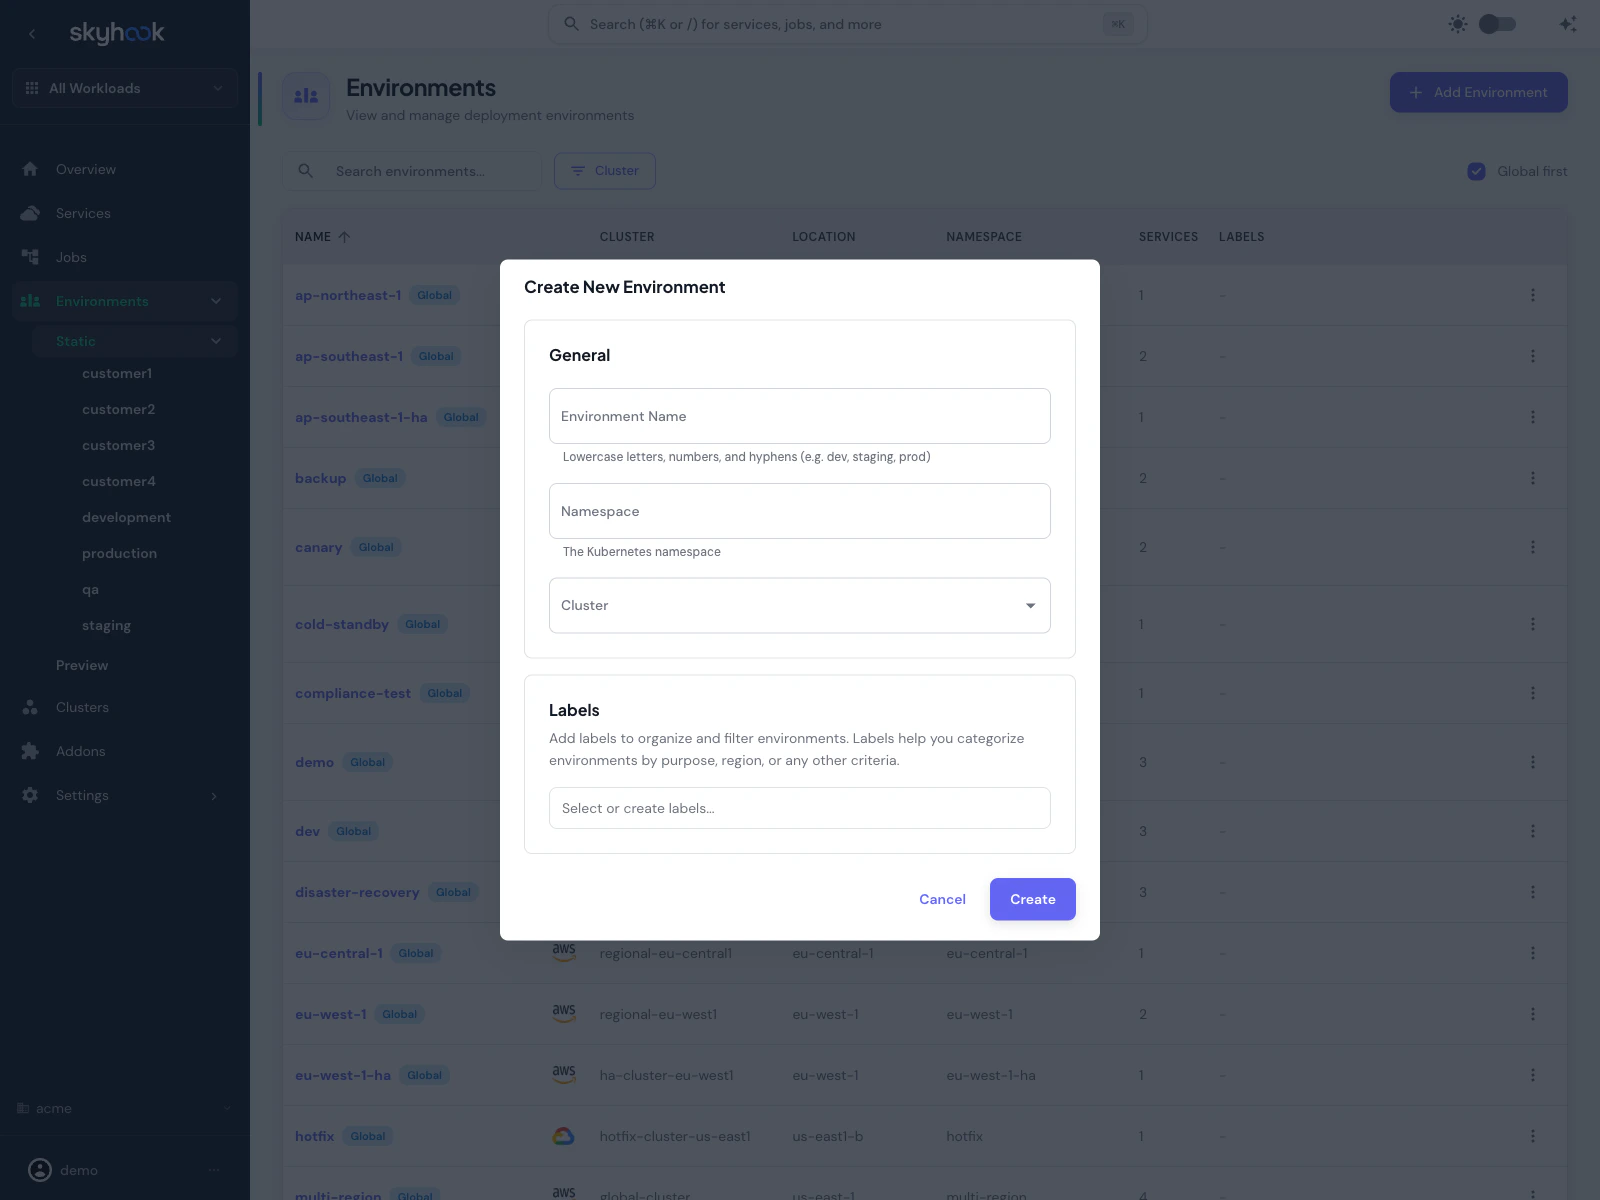
Fields
General:- Environment Name — lowercase letters, numbers, and hyphens only (e.g.
dev,staging,prod). Used everywhere the environment is referenced. - Namespace — the Kubernetes namespace. Defaults to the environment name if left empty.
- Cluster — target cluster. Clusters come from Infrastructure > Clusters.
- Labels — free-form labels for grouping environments. Labels don’t affect deployment — they’re used for filtering and for label-based deploy rules (see below).
Clone configuration from another environment
When creating a new environment, you can clone deployment configuration from an existing environment to avoid retyping settings. The clone section appears below Labels once you pick a source environment. Clonable sections:- Deployment strategy (RollingUpdate, Recreate, etc.)
- Pod resources (CPU/memory requests and limits)
- Autoscaling (HPA thresholds, replica counts)
- Health checks (liveness, readiness, startup probes)
- ArgoCD configuration — sync policy, destination overrides
Labels and label-based deployments
Labels are the primary way to organize environments at scale. Common uses:- Region —
region:us-east,region:eu-west - Role —
role:canary,role:ha - Team —
team:payments,team:analytics - Lifecycle —
lifecycle:temporary,lifecycle:production
Filtering by label
The environment label picker (in the services deploy tab, the deployments list page, and the org environments page) lets you:- Select one or more environments by name
- Or select one or more labels — every environment matching any selected label is included
role:canary” without listing them individually.
Label-based deployments
When deploying a service, the environment picker has two tabs:- Environments — pick specific environments to deploy to
- Labels — pick one or more labels, and Skyhook deploys to every environment that matches
Filtering the deployment list
The deployments list page (per service) has a label filter in addition to the environment name filter — so you can see “all deployments to environments labeledregion:us-east” across time.
AutoDeploy
Environments can be marked as auto-deploy targets, meaning every new commit/image build automatically deploys without manual intervention. Two levels:- Service-level AutoDeploy — set on a specific environment within a service’s environments tab. Only that service auto-deploys.
- Global environment AutoDeploy — set on a Global environment from the context menu on the environments list page. Every service using that global environment auto-deploys.
Environment name prefix
For cases where you want to run multiple instances of the same workload in the same Kubernetes namespace — think multi-tenant apps, customer-specific deployments — you can enable environment name prefixing to disambiguate Kubernetes resource names. Toggle Enable environment name prefix on the service’s Settings > Deployment tab (or the job’s Settings > General tab). When enabled, Kubernetes resources are named<env-name>-<service-name> instead of just <service-name>:
- Deployment:
dev-my-serviceinstead ofmy-service - Service:
dev-my-serviceinstead ofmy-service - ConfigMap / Secret:
dev-my-serviceprefix - Ingress:
dev-my-serviceprefix
dev-my-service and staging-my-service coexist in the same namespace without colliding.
Environment settings beyond the basics
The basic create dialog covers name/namespace/cluster/labels. Each environment has additional settings you can edit after creation:- Ingress — enable ingress, ingress host, ingress class
- Deployment strategy — RollingUpdate, Recreate, with max surge / max unavailable
- Pod resources — CPU/memory requests and limits
- Autoscaling — HPA targets (see Autoscaling)
- Health checks — liveness, readiness, startup probes
- ArgoCD config — destination cluster, sync policy, ignore differences
Per-environment env vars and secrets
Environments can override env vars and secrets on a per-service basis. Two layers:- Base env vars defined on the service apply to every environment by default
- Environment overrides apply only when that environment is selected
Deleting environments
From the environments list, select one or more rows and click Delete (or use the context menu on a single row). Skyhook opens a PR removing the environment from the deployment repo; ArgoCD prunes resources on sync. Bulk delete is supported — tick the checkboxes on multiple rows and delete them all in one PR.Troubleshooting
'Set up your environments' gate on a fresh org
'Set up your environments' gate on a fresh org
Skyhook needs a connected cluster and a deployment repository to write environment manifests. The gate shows a checklist: Connect a Kubernetes cluster (covered by Connecting Clusters) and Configure a deployment repository (Settings → Code & Repositories). Once both are done, the environments list appears.
Environment name prefix broke my ingress host
Environment name prefix broke my ingress host
When you enable the environment name prefix, the default ingress host is regenerated using the new prefixed service name. Custom ingress hosts are preserved; if you were relying on the auto-generated host, update it in the environment’s Ingress settings.